
How to Print Your Patterns
Guys, when I say that I send out a lot of Adobe Illustrator patterns, I mean I send out A LOT of Adobe Illustrator patterns! It continues to be the most popular format requested after a designer has me either make patterns for them or do the pattern grading.
If you have not experienced the instant gratification of receiving your pattern files in the Adobe Illustrator format and are wondering how it works, well let me tell you:
Firstly you will need to have Adobe Illustrator. My personal preference is Adobe Creative Cloud which gives you access to the whole suite of Adobe products for a monthly subscription rate.
Once your pattern is digitized/graded I will send your finished pattern to you as a .ai file which you then use Adobe Illustrator to open up.
From here you can format this pattern for distribution as a home sewing pattern that your customer can download, you can set up the file for sublimation printing, or you can print off only the sizes/ pieces that you need for your small batch production.
Benefits of using Adobe Illustrator files for sewing patterns:
Home sewing patterns are the most popular category that utilizes .ai files.
You can easily see exactly what you are getting and if something doesn’t look the way you envisioned, then you just email me about the issue and I fix it up asap.
You have the flexibility to print out or work with only the pieces that you need. For example, you may want to test out a blouse pattern that I made for you, but don’t want to put in the facings just yet. You can omit those for now and save some paper.
You have editable pattern pieces that are a blank canvas for however you want them to look. With this, you can label, apply branding, or use the pieces as a reference in your tech pack.
You don’t have to pay for the shipping of physical, hard copy patterns (I do offer this as an option though!)
If your pattern is graded, you can print only the size you want to work with instead of having to sort through all sizes.
Benefits of using Adobe Illustrator files for small batch production
You can make alterations on your end for custom orders. Lets say that I grade your pattern but you have a customer who needs a tall version of your pattern. Well, you can easily add the length yourself.
You can print only the sizes that you need to produce/work on.
If you are doing sublimation printing, Illustrator works seamlessly with your print layouts.
The number one question I get about AI files- Will I set up your pattern for at home printing on a desktop printer, or copyshop files?
I’m sorry, but no. My work has to stop at the file export. I don’t get involved in anything involving Adobe Illustrator for my clients. It’s just not part of my workflow. Formatting Adobe Illustrator patterns involves a lot of really brand specific details and personal preferences at a very fiddly level. I totally get that you want your pattern a certain way, but I’m a pattern maker who’s busy with fit and numbers and sizing, not a graphic designer. It’s like your plumber may know something about electricity, but do you really want them taking care of the electrical tasks?
But the good news is that I will show you how you can set up the Adobe Illustrator patterns that you receive from me for printing!
How to set up your Adobe Illustrator patterns for printing on your home desktop printer
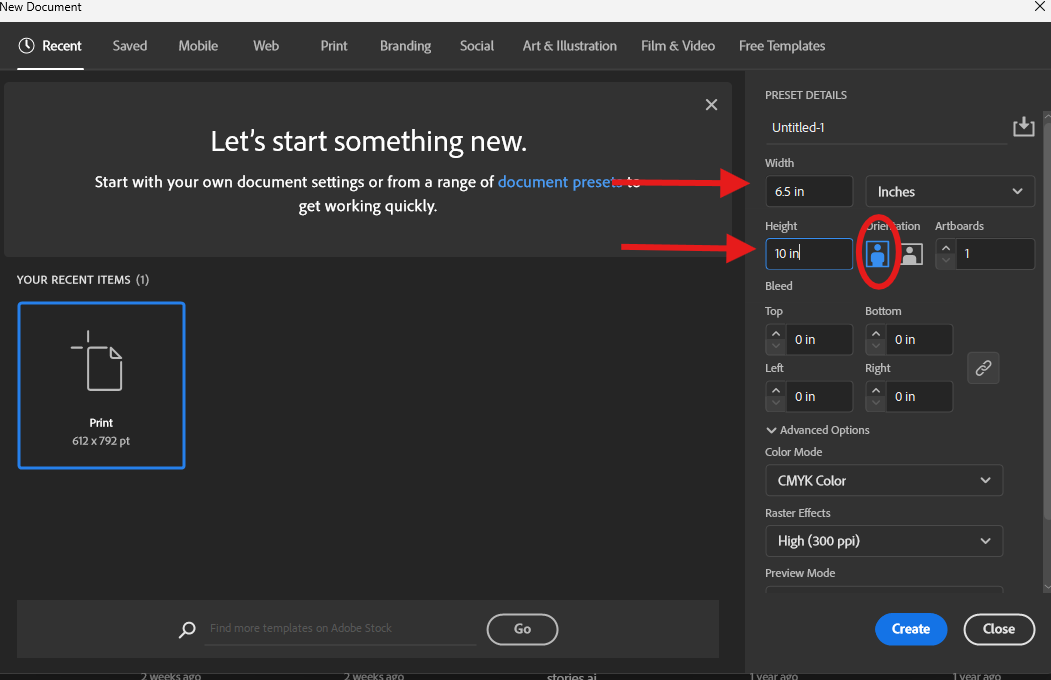
Step 1: Create a brand new Adobe Illustrator document.

Step 2: Choose the custom document size and set to 6 1/2” x 10” in portrait orientation and select “create”.
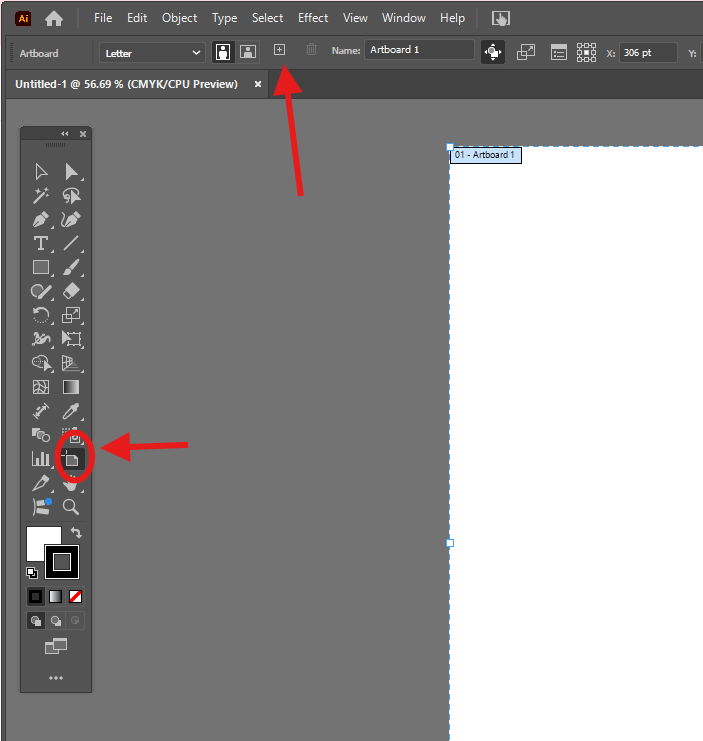
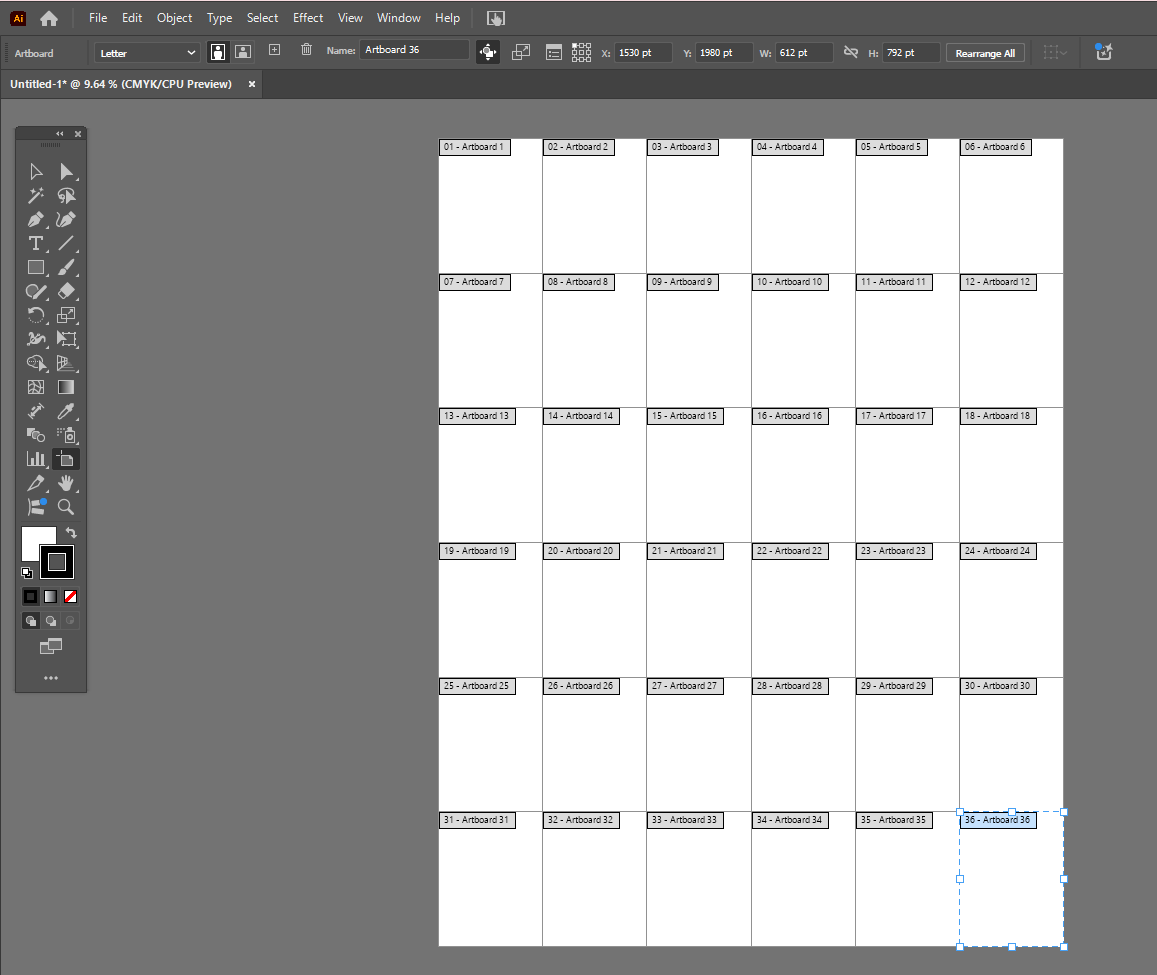
Step 3: Activate the artboard tool and then hit the plus button for the number of artboards you want. I suggest 6 across and 6 down to get started (you can always easily remove and once you understand the process, you can add more as needed). Put the 6 across and then manually move the 7th artboard to start another row. Add 5 more artboards. Repeat until you have 6 rows.
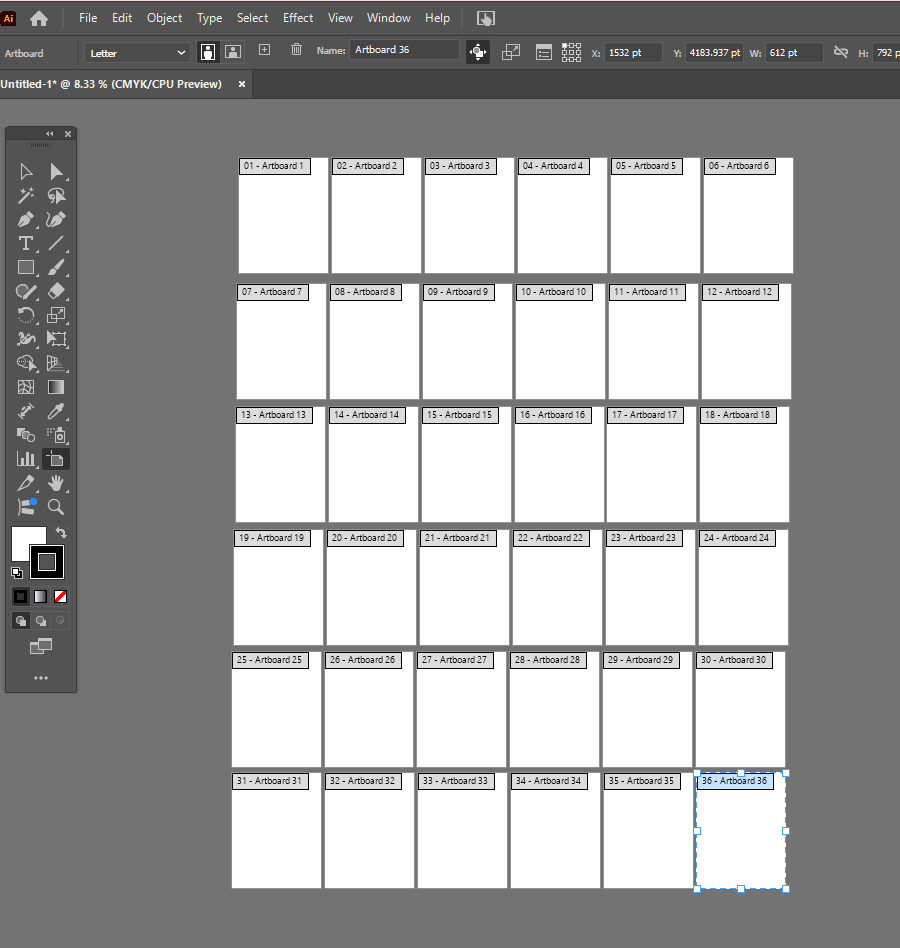
The artboard layout should look something like this:
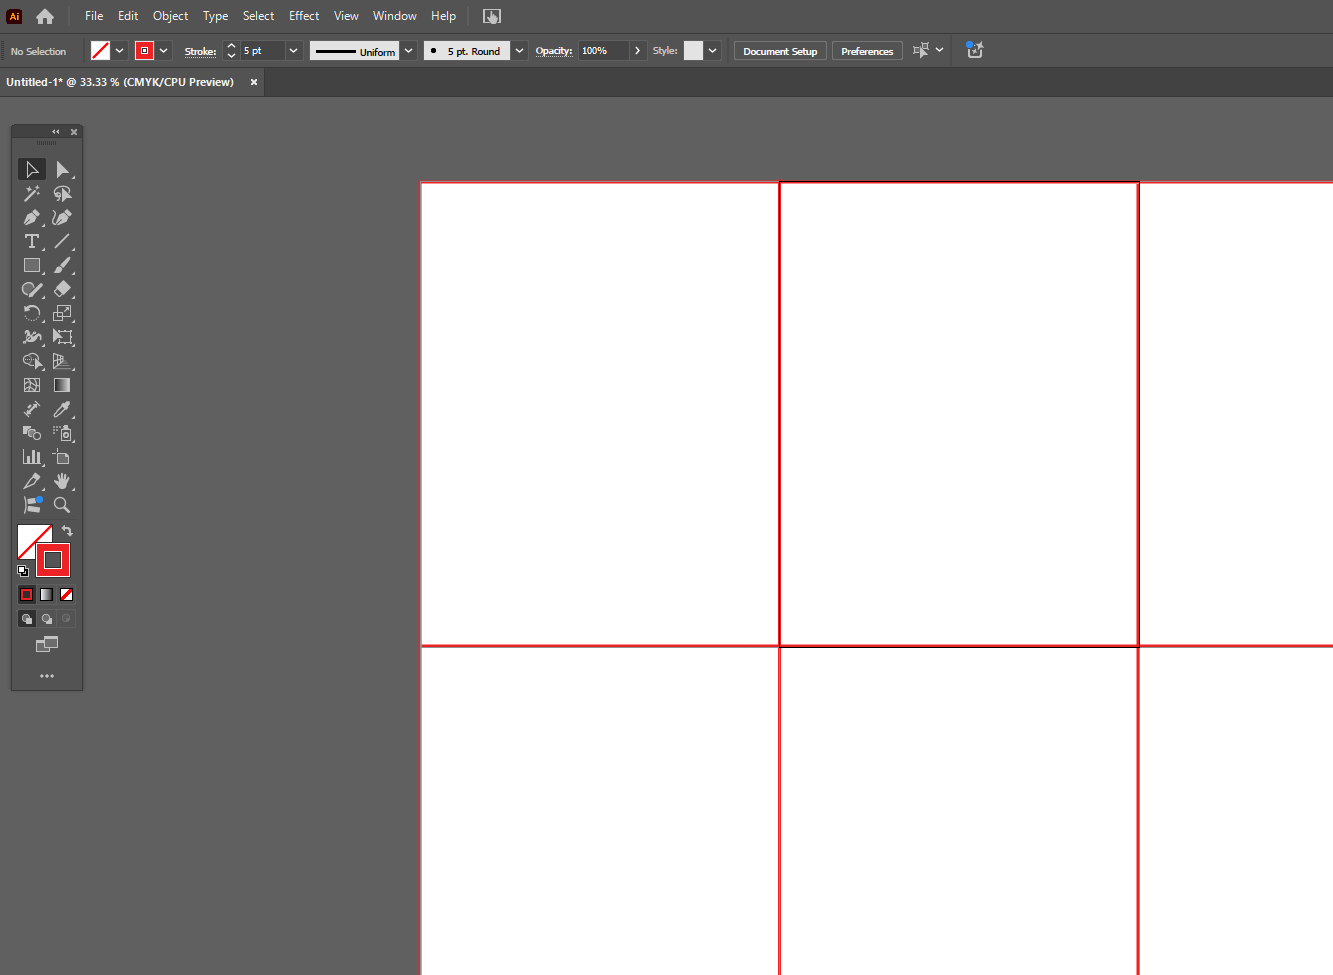
Step 4: On the top tool bar click “rearrange artboards” Within this window you enter in the number of columns, which for this example is 6. You will also set the spacing to be 0” so the pages are touching.
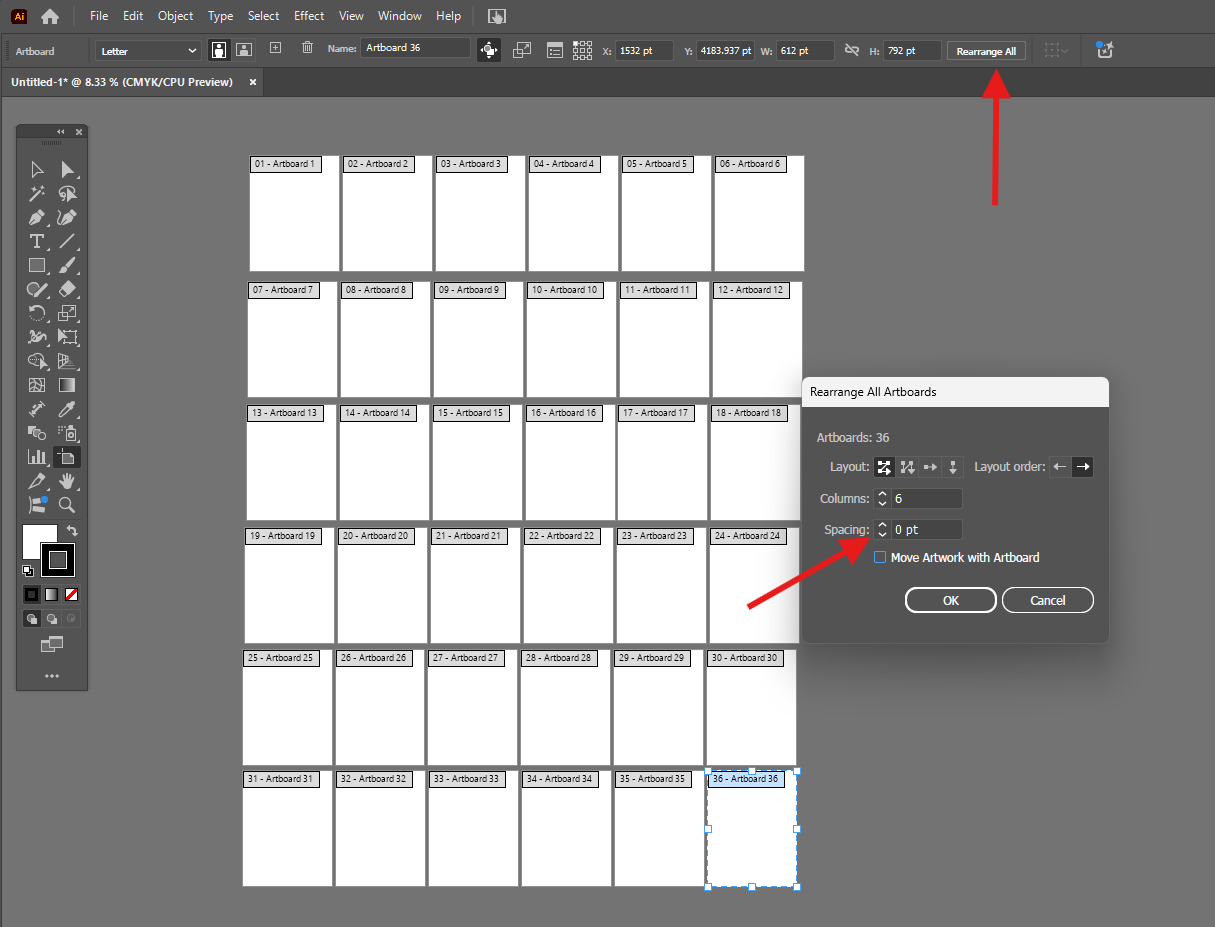
This is what the final result should look like:
Step 5: Between each artboard, create a solid line going from the top of the column to the bottom of the column. Repeat the process horizontally. Use the rectangle tool to create an external outline around all artboards (shown in red for clarity, but should probably be black for easy printing.
Step 6: If you have a lot of pages, I like to set up an overlapping indication of page number that is shared on adjoining pages, so you can easily match up. Do this on the top and bottom. You may even want to number the pages to be certain everything will line up.
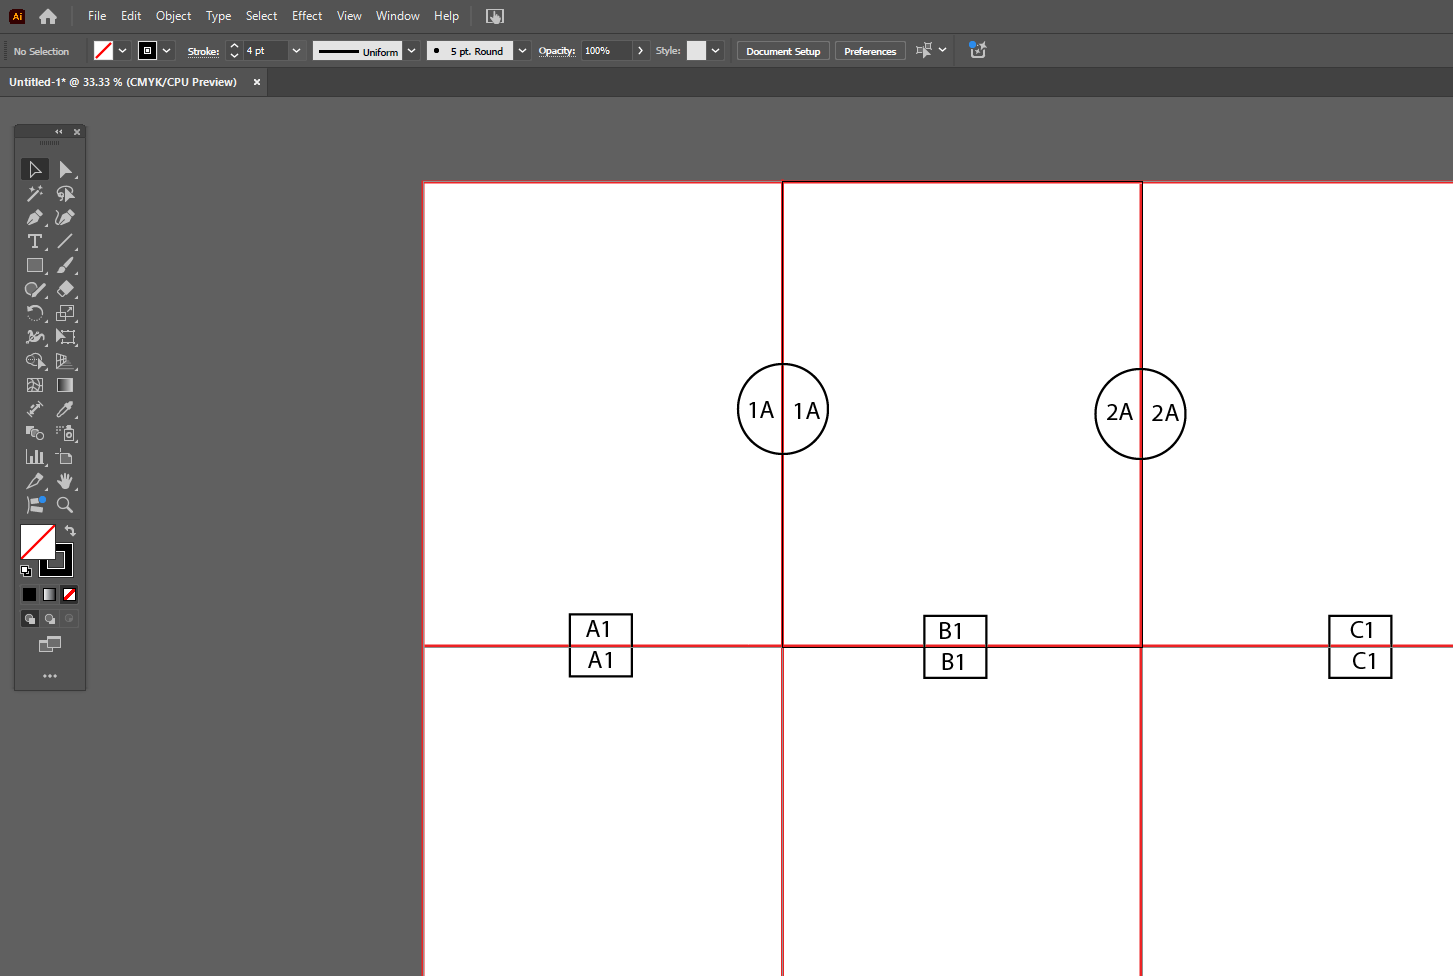
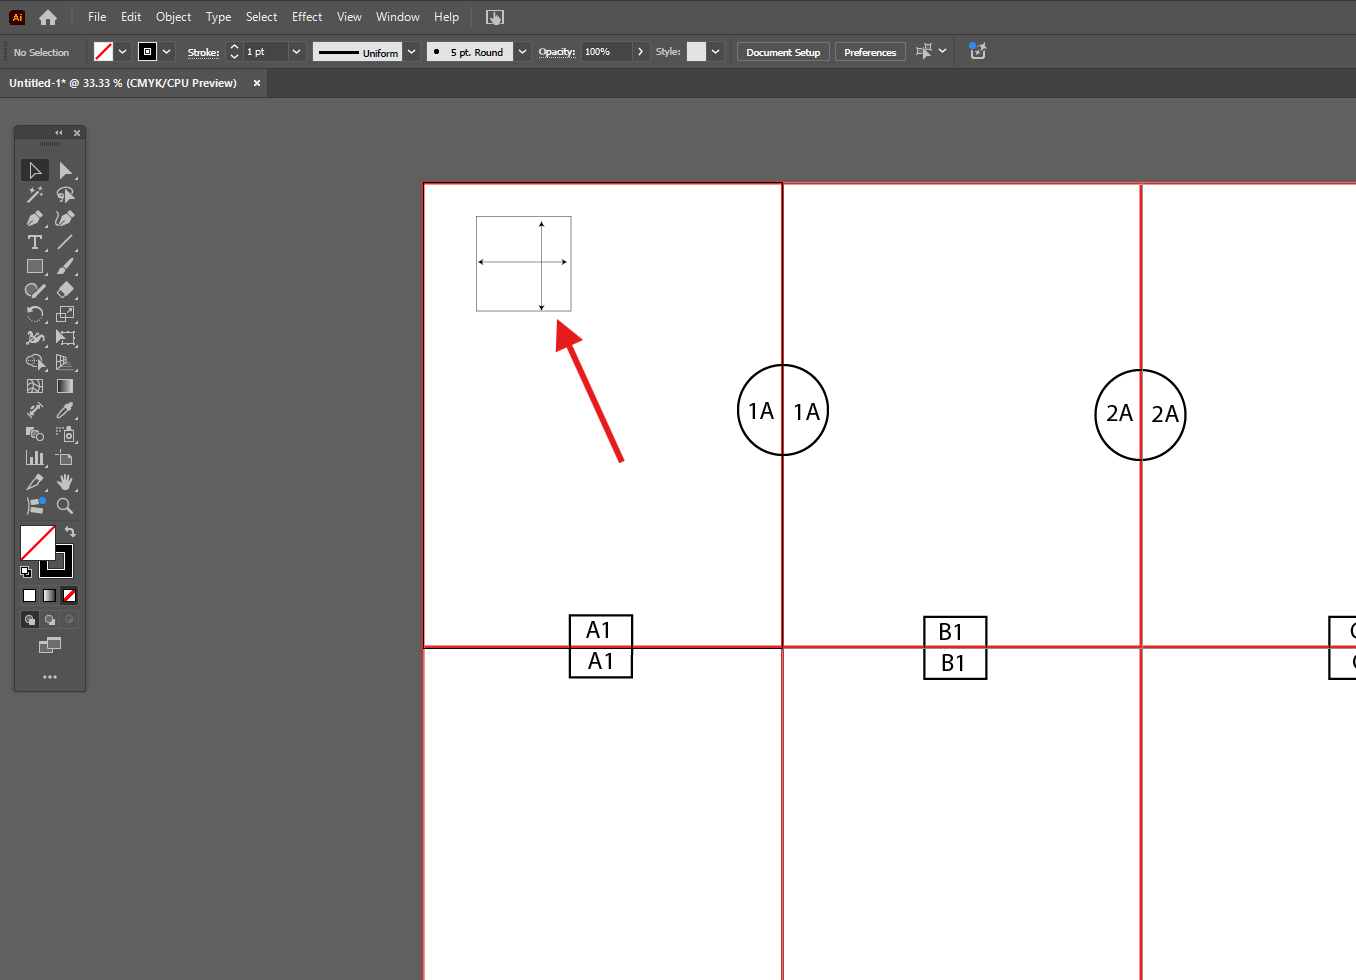
Step 7: On the very top left page it is a good idea to include a scale box to ensure that everything you print is to scale. I usually make a square that is 2” x 2”. When it comes out of the printer first, double check that it matches the measurements of your scale box before printing the entire pattern.
Step 7: Start placing your pattern pieces over top the tiled pages. I would strongly recommend to create a new layer for pattern pieces and save your artboard setup as a template that you can use over and over again so you only have to do the set up once.
Printing and assembling your Adobe Illustrator pattern
You can then select “print”. It is very important that you select “Do Not Scale” in the scaling box.
Hit print and then double check that your scale box on the first page looks correct. If not, stop the printing process at once and review where the scale discrepancy happened.
Take your printed pattern and cut off the margins on the right hand side for the first column. Start to arrange the pages so they align and tape together.
For the second row, cut off the top margins and the right margins and then lay out and tape together these pages on top of the previous row.
Repeat for remaining pages. (if you want a super in depth assembling guide, you can check out my home sewing pattern website’s blog- The definitive guide to assembling PDF patterns
Using a professional printing service
What I mean by this is using either your local big box office supply retailer or someone online that can print off your patterns. The standard format for these printers is paper sizes is either 36” wide or A0.
To set up your pattern for printing at a copyshop you will do the following:
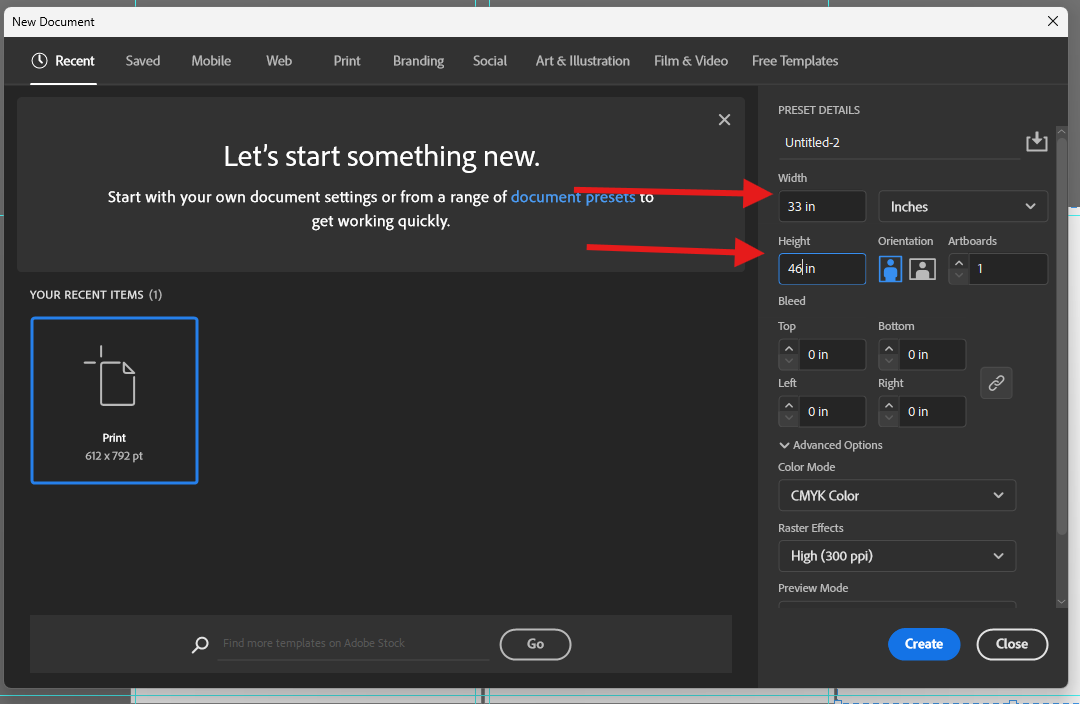
Step 1: Create a brand new Adobe Illustrator document.
Step 2: Choose the custom document size and set to 33” x 46” in portrait orientation and select “create”.
Step 3: Activate the artboard tool and then hit the plus button for the number of artboards you want. If you have a lot of pattern pieces you can add more artboards by selecting the + button when the artboard tool is invoked.
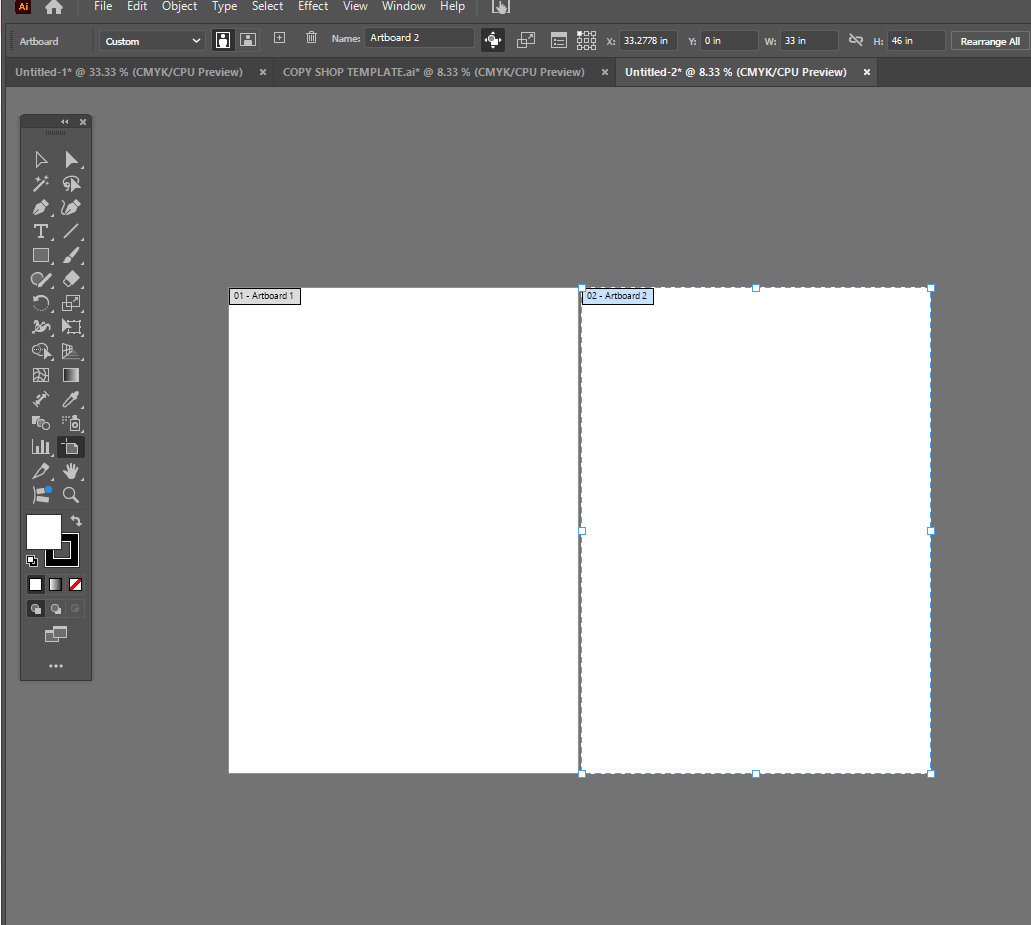
Step 4: Place your pattern pieces, ensuring they do not go past the margins of each page.
Step 5: It’s a good idea to include a scale box for this as well so you can tell the copy shop to double check and you can double check the printout.
Step 6: Save the file as a .PDF so it can easily be emailed back and forth.
I hope this information helps to improve your own workflow. Please keep in mind that these are basic guidelines. You can customize page tiling size to your own preferences, but I think you have enough information to get started on printing your own patterns.